4 Weeks of Decluttering – Week 2: The Kitchen
This week, we’re tackling a significant challenge: decluttering the kitchen. With its abundance of food, appliances, dishes, and cookware, organizing the kitchen might seem overwhelming. However, breaking it down into manageable steps makes it achievable. The aim is to create a tidy, sanitary space for food preparation and social gatherings. Let’s get started!
Step 1: Planning
The kitchen is a bustling area, so planning is crucial. Consider the placement of items for optimal convenience. Identify what you need quick access to while cooking, your preferred food preparation counter space, and where you dish out meals. This helps prioritize the arrangement of dishes and cooking tools. Reserve waist and eye-level spaces for daily essentials like cereal, coffee, plates, cups, and utensils. Utilize lower and higher spaces for less frequently used items, such as large pots or baking dishes.
Step 2: Decluttering Cupboards
Tackle one cupboard at a time according to your plan. Empty each cupboard, wiping down the insides to remove dust and crumbs. Reorganize the contents, leaving out items that don’t belong and placing everything else back neatly.
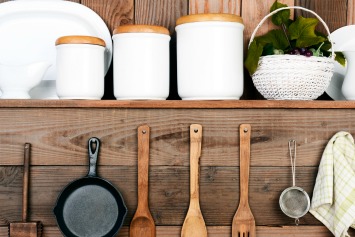
Step 3: Assessing Appliances
Evaluate your appliances and cookware. Consider the necessity of each item. For example, an unused cotton candy maker might be better donated. Reduce duplicates of kitchen tools, keeping only what’s necessary and storing decorative items separately.
Step 4: Collect and Repackage
Gather non-perishables to donate if you have excess. Repackage pantry items into storage-friendly containers to reduce clutter and improve accessibility.
Step 5: Organizing the Fridge
Decluttering the fridge is essential for a healthy lifestyle. Discard old or unused items, focusing on expiration dates. Rearrange the fridge, prioritizing items that will expire soon.
Step 6: Final Touches
Clean all surfaces, add decorative elements, and store unsightly items. Consider hiding frequently used appliances for a tidier appearance.
Bonus Tips: Cleaning the Microwave
For a quick microwave clean, spray the interior with water, microwave a wet sponge for two minutes on low, then wipe away food residue easily.
By following these steps, your kitchen will become a clean, organized, and welcoming space. Take pride in your effort and enjoy your newly decluttered kitchen. Remember, decluttering can be a therapeutic experience. Happy cleaning and cooking!
This edited version aims to be more concise and easier to follow, with clear step-by-step instructions and tips for maintaining a decluttered kitchen.

Jill Taylor, USC™, UFSC™, UCPO™, UDRC™
Certified UltimateStager™ | Feng Shui Specialist™
Ultimate Professional Organizer™ | Ultimate Decorator & ReDesigner™
Manager of Student Experience & Tutoring